Tue, September 20, 2011, 07:21 PM under
GPGPU |
ParallelComputing |
VisualStudio
BELOW IS OUTDATED INFORMATION, PLEASE SEE MY UPDATED POST ON OUR TEAM BLOG:
http://blogs.msdn.com/b/nativeconcurrency/archive/2012/03/17/start-gpu-debugging-in-visual-studio-11.aspx
---
With VS 11 Developer Preview we have invested tremendously in parallel debugging for both CPU (managed and native) and GPU debugging. I'll be doing a whole bunch of blog posts on those topics, and in this post I just wanted to get people started with GPU debugging, i.e. with debugging C++ AMP code.
First I invite you to watch 6 minutes of a glimpse of the C++ AMP debugging experience though this video (ffw to minute 51:54, up until minute 59:16). Don't read the rest of this post, just go watch that video, ideally download the High Quality WMV.
Summary
GPU debugging essentially means debugging the lambda that you pass to the parallel_for_each call (plus any functions you call from the lambda, of course). CPU debugging means debugging all the code above and below the parallel_for_each call, i.e. all the code except the restrict(direct3d) lambda and the functions that it calls. With VS 11 you have to choose what debugger you want to use for a particular debugging session, CPU or GPU. So you can place breakpoints all over your code, then choose what debugger you want (CPU or GPU), and you'll only be able to hit breakpoints for the code type that the debugger engine understands – the remaining breakpoints will appear as unbound. If you want to hit the unbound breakpoints, you'd have to stop debugging, and start again with the other debugger. Sorry. We suck. We know. But once you are past that limitation, I think you'll find the experience truly rewarding – seriously!
Switching debugger engines
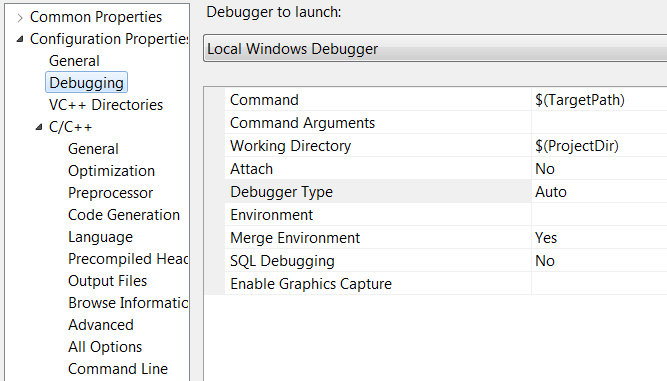
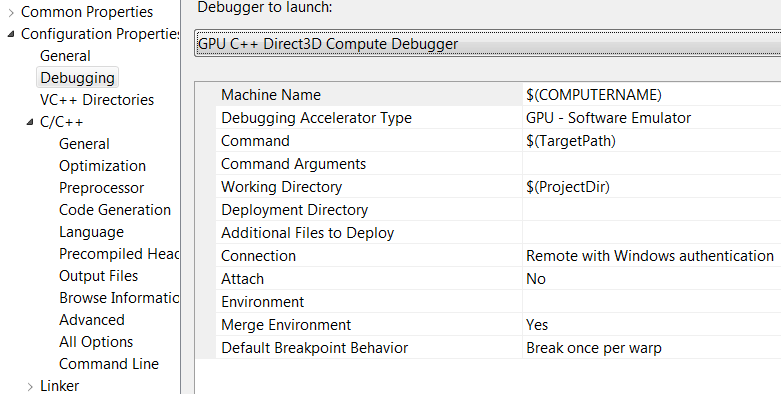
With the Developer Preview bits, one way to switch the debugger engine is through the project properties – see the screenshots that follow.
This one is showing the CPU option selected, which is basically the default that you are all familiar with:
This screenshot is showing the GPU option selected, by changing the debugger launcher (notice that this applies for both the local and remote case):
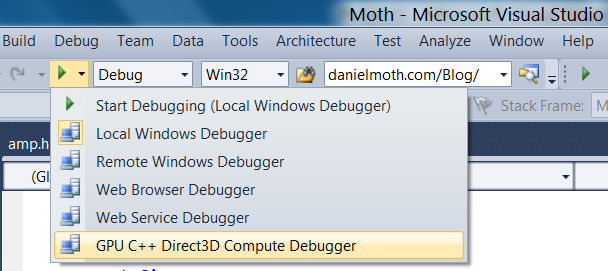
You actually do not have to open the project properties just for switching the debugger engine, you can switch the selection from the toolbar in VS 11 Developer Preview too – see following screenshot (the effect is the same as if you opened the project properties and switched there)
Breakpoint behavior
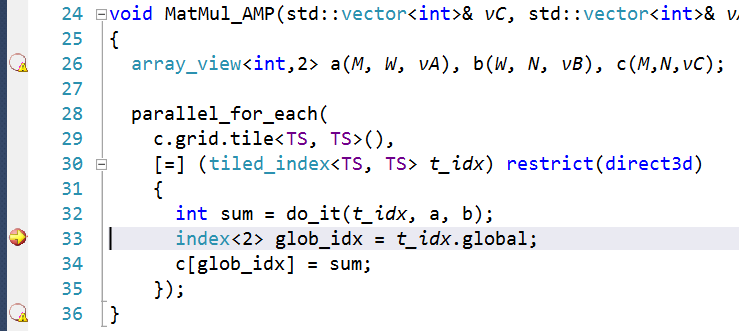
Here are two screenshots, one showing a debugging session for CPU and the other a debugging session for GPU (notice the unbound breakpoints in each case)
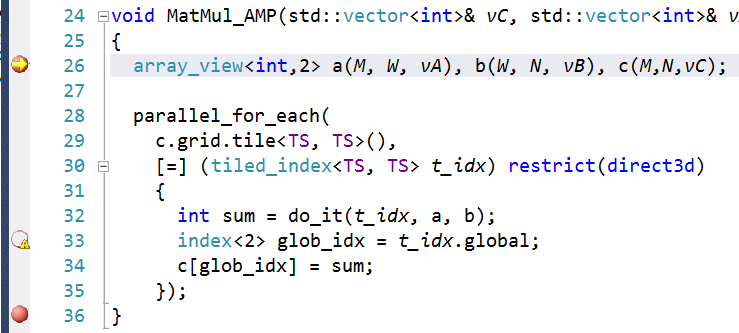
…and here is the GPU case (where we cannot bind the CPU breakpoints but can the GPU breakpoint, which is actually hit)
Give C++ AMP debugging a try
So to debug your C++ AMP code, pull down the drop down under the 'play' button to select the 'GPU C++ Direct3D Compute Debugger' menu option, then hit F5 (or the 'play' button itself). Then you can explore debugging by exploring the menus under the Debug and under the Debug->Windows menus. One way to do that exploration is through the C++ AMP debugging walkthrough on MSDN.
Another way to explore the C++ AMP debugging experience, you can use the moth.cpp code file, which is what I used in my BUILD session debugger demo. Note that for my demo I was using the latest internal VS11 bits, so your experience with the Developer Preview bits won't be identical to what you saw me demonstrate, but it shouldn't be far off.
Stay tuned for a lot more content on the parallel debugger in VS 11, both CPU and GPU, both managed and native.